Adding Payments in EMS
 Print
Print Email
EmailAdd payments to existing registrations in Events Management System.
Individual Payments
Payments are added through the Registrant Roster on the event dashboard. Search for the registrant who the payment will be applied to, and click "Payments" under the Actions column on the left side of the screen. You will need to select the payment method type. Depending on the payment method, use the instructions below.
Check
1. Select Check for the Payment method and click "Add Payment".
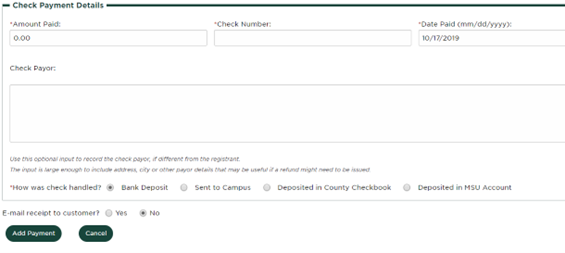
2. Enter the amount paid based on what is on the check.
3. Enter the check number, usually listed on the top right of the check.
4. Enter the date paid as the date the check is entered into EMS.
5. Enter the check payor as the name and address on the check if it is not the same as the registrant.
6. Select "Deposited in MSU Account" as how the check was handled unless the payment is entered by a county.
-
- Counties should select "Sent to Campus" or "Deposited in County Checkbook" depending on the situation.
7. Click "Add Payment".
8. Deposit check or send to campus. Don't forget to include a deposit slip with the check if you send it to campus.
Cash
1. Select "Cash" as the payment method and click "Add Payment".
2. Enter the amount paid.
3. Enter the date paid as the date the payment is entered in EMS.
4. Select "Deposited in MSU Account" as how the cash was handled unless the payment is entered by a county.
5. Counties should select "Deposited in County Checkbook". NEVER mail cash.
6. Click "Add Payment".
MSU Account Number
1. Select "MSU Account" as the payment method and click "Add Payment".
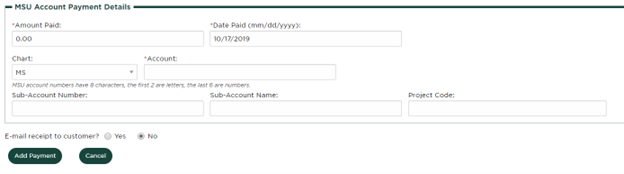
2. Enter the amount paid.
3. Enter the date paid as the date the payment is entered in EMS.
4. Enter the MSU Account, starting with two letters followed by six numbers.
5. Enter the sub-account number, sub-account name, and project code if applicable. These fields are optional and may not be relevant for each MSU account payment.
6. Click "Add Payment".