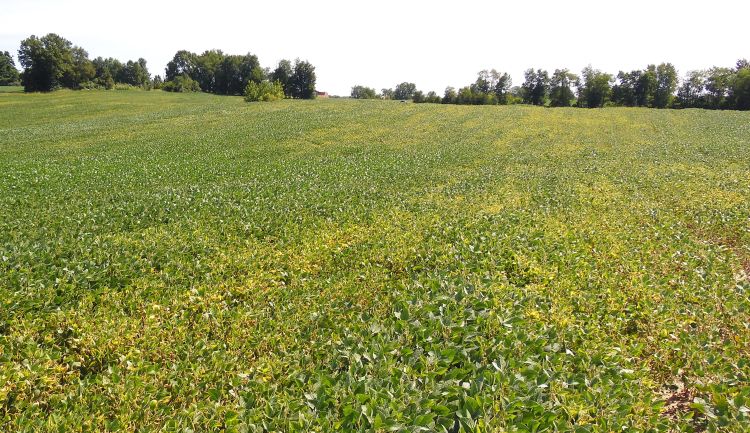
Plant tissue analysis: An important part of nutrient management
Need a report card on your fertilizer program or diagnosis of a nutrient deficiency? Plant tissue analysis is your answer!

Plant tissue analysis is determining, in a laboratory, the total elemental content of the whole plant or parts of plants, typically leaves or petioles (leaf stem). In field crops, plant tissue analysis, in conjunction with a soil test program, can serve as a check on a fertilizer program. Plant tissue analysis can also serve as a trouble shooting tool to diagnose a suspected nutrient deficiency.
Plant tissue analysis as a check on a fertilizer program
Plant nutrient levels can vary depending on the growth stage of the plant. Therefore, when taking plant samples for analysis as a check on a fertility program, the plant growth stage at sampling is important. Also, the nutrient levels can vary from one part of the plant to the other. Plant nutrient sufficiency levels have been calibrated to certain growth stages and parts of the plant.
See the following table for sampling time and plant part to be sampled for corn, wheat and soybeans, according to “Secondary and Micronutrients for Vegetables and Field Crops,” Michigan State University Extension bulletin E486.
|
Recommended sampling time and part of plant for five field crops | ||
|---|---|---|
|
Crop |
Sampling time |
Plant part |
|
Corn |
Initial silk |
Ear leaf |
|
Wheat |
Prior to initial bloom |
Upper leaves |
|
Soybeans |
Prior to initial flowering |
Upper fully developed leaf |
|
Alfalfa |
Prior to initial flowering |
Top 6 inches |
|
Sugarbeets |
Mid-season |
Center fully developed leaf |
For crops not noted above, generally collect the upper fully developed leaf prior to the reproductive stage or mid-season. The table below reports the sufficiency ranges, in percentage, of dry weight for primary and secondary nutrients, according to “Secondary and Micronutrients for Vegetables and Field Crops.”
|
Sufficiency ranges of N, P, K, Ca, Mg and S for five field crops | ||||||
|---|---|---|---|---|---|---|
|
Crop |
N (%) |
P (%) |
K (%) |
Ca (%) |
MG (%) |
S (%) |
|
Corn |
2.76 – 3.50 |
0.25 – 0.50 |
1.71 – 2.50 |
0.21 – 1.00 |
0.16 – 0.60 |
0.16 – 0.50 |
|
Wheat |
2.59 – 3.00 |
0.21 – 0.50 |
1.51 – 3.00 |
0.21 – 1.00 |
0.16 – 1.00 |
0.20 – 0.40 |
|
Soybeans |
4.26 – 5.50 |
0.26 – 0.50 |
1.71 – 2.50 |
0.36 – 2.00 |
0.26 – 1.00 |
0.21 – 0.40 |
|
Alfalfa |
3.76 – 5.50 |
0.26 - 0.70 |
2.01 – 3.50 |
1.76 – 3.00 |
0.31 – 1.00 |
0.31 – 0.50 |
|
Sugarbeets |
3.01 – 4.50 |
0.26 – 0.50 |
2.01 – 6.00 |
0.36 – 1.20 |
0.36 – 1.00 |
0.21 – 0.50 |
As you can see, while the sufficiency levels are generally consistent between nutrients, especially phosphorus (P) and potassium (K).
When collecting plant tissue samples, it’s important to get a representative sample across whatever area you are sampling. Like a soil sample, collect in a zig-zag pattern. Collect at least 25 leaves, one leaf (or two in the case of wheat) from each plant, randomly across the entire area.
When analyzed, the plant tissue analysis can confirm the adequacy of nutrients or identify the inadequacy (or less often toxicity) of one or more nutrients.
For analysis of plant tissue samples, contact A&L Great Lakes Lab in Fort Wayne, Indiana, or Dairyland Lab in Battle Creek, Michigan. The complete analysis includes nitrogen (N), phosphorus (P), potassium (K), calcium (Ca), magnesium (Mg), zinc (Zn), manganese (Mn), copper (Cu), iron (Fe), boron (B), sulfur (S), sodium (Na) and aluminum (Al). Contact the lab for prices.
Plant tissue analysis to diagnose a suspected nutrient deficiency
When a grower has a problem area in the field and a nutrient deficiency is suspected, plant tissue analysis can be used to help determine the problem. In this case, four samples should be taken—one soil sample from the problem area, one soil from an adjacent “good” area, one tissue sample from the problem area and one tissue sample from the good area. This approach should identify the cause of the problem if the problem is nutritional in nature.
Whether testing as a check on a fertility program or diagnosing a nutrient deficiency, take care in getting the samples delivered to the lab quickly so the sample does not mold. If you live within a reasonable driving distance of the lab, deliver them yourself or have a family member or employee deliver them for you. For most, however, a mail or package delivery service must be used. You can lay the samples in the sun for an afternoon to dry them down somewhat.
Send the samples on a day where they will not sit in transit over the weekend. That is, they should be mailed on a Monday, Tuesday or Wednesday if delivery can be assured by Friday. Samples should be placed in paper, not plastic bags, so the sample can “breathe.” The laboratory can refuse to test moldy samples.


 Print
Print Email
Email